

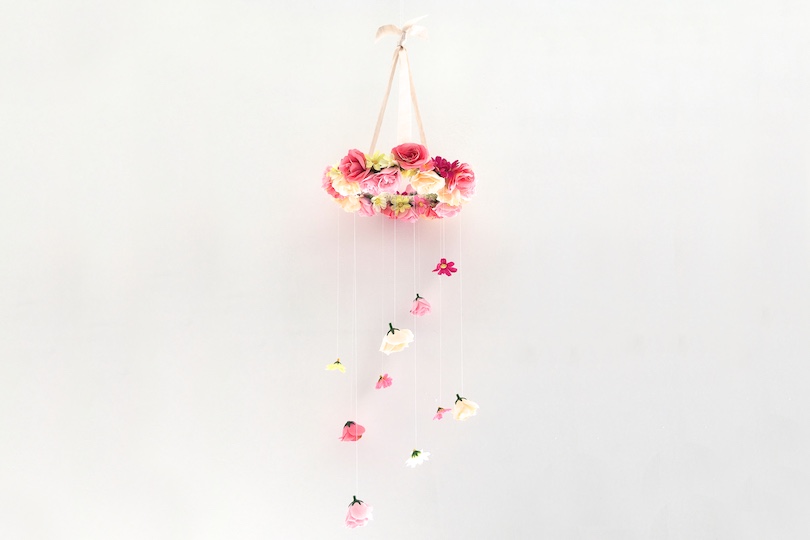
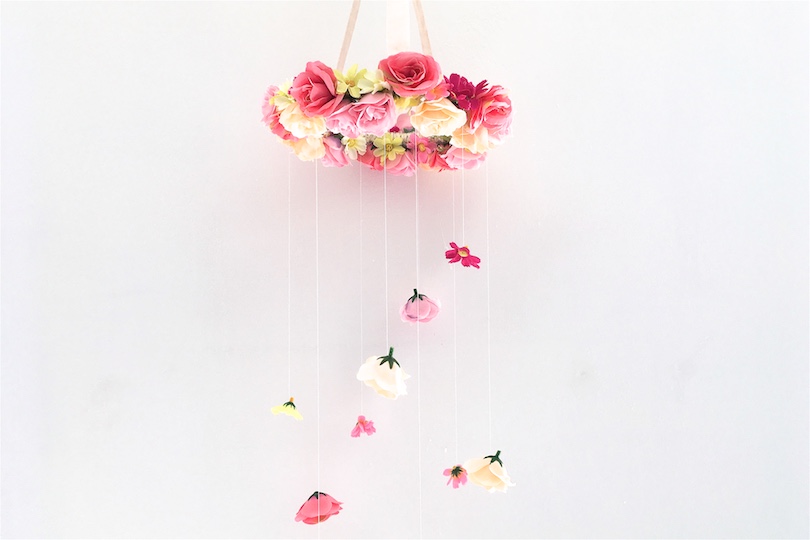
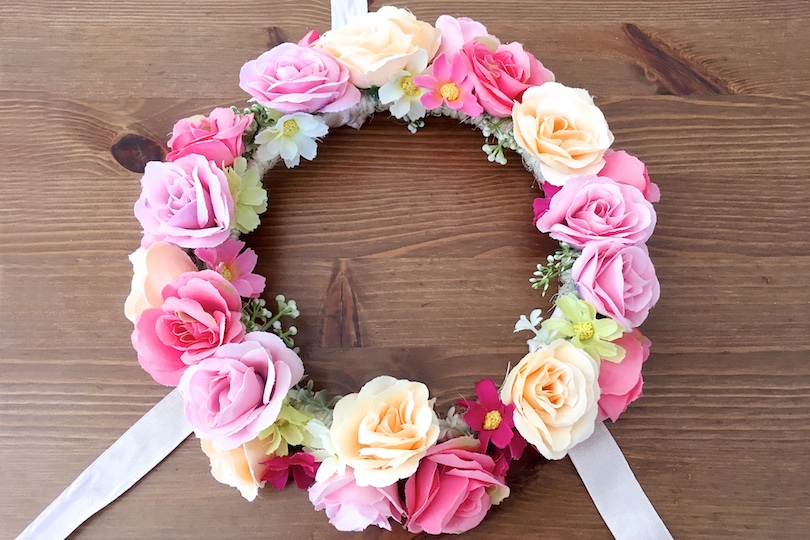
Flower Chandelier DIY
I wanted to get a cute mobile for our little girl’s nursery, but couldn’t find one I really loved. So I decided to make one myself and found some cute pictures of similar flower chandeliers on Pinterest.
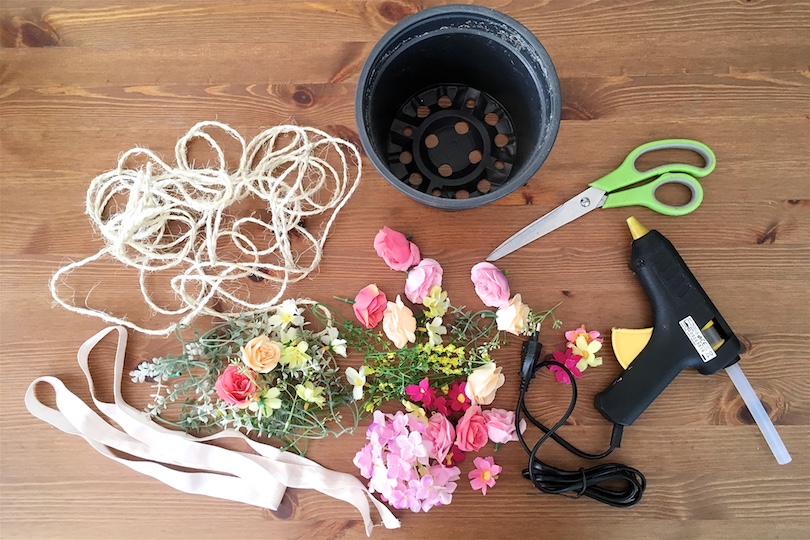
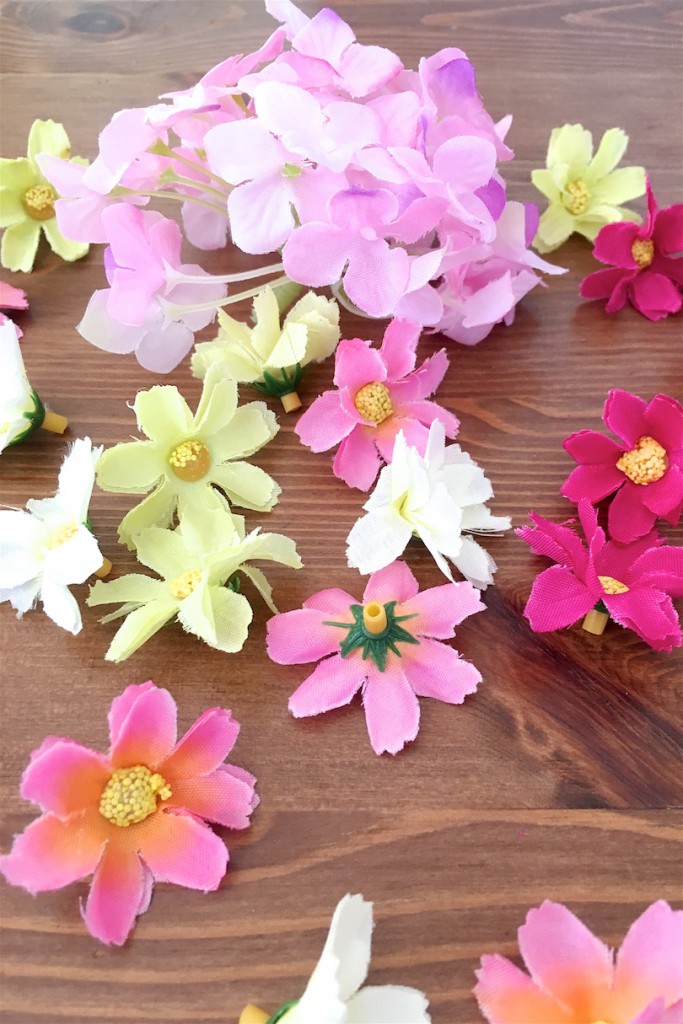
For this cute flower chandelier you gonna need the following things: ring, rope, glue gun, scissor, ribbon, needle, threads and looots of flowers
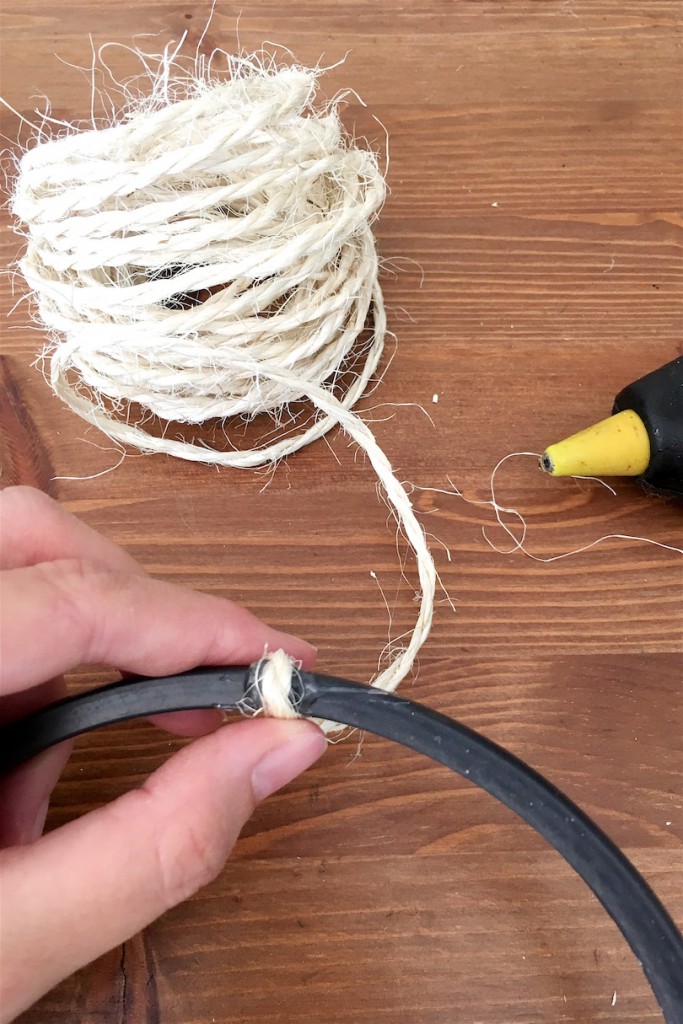
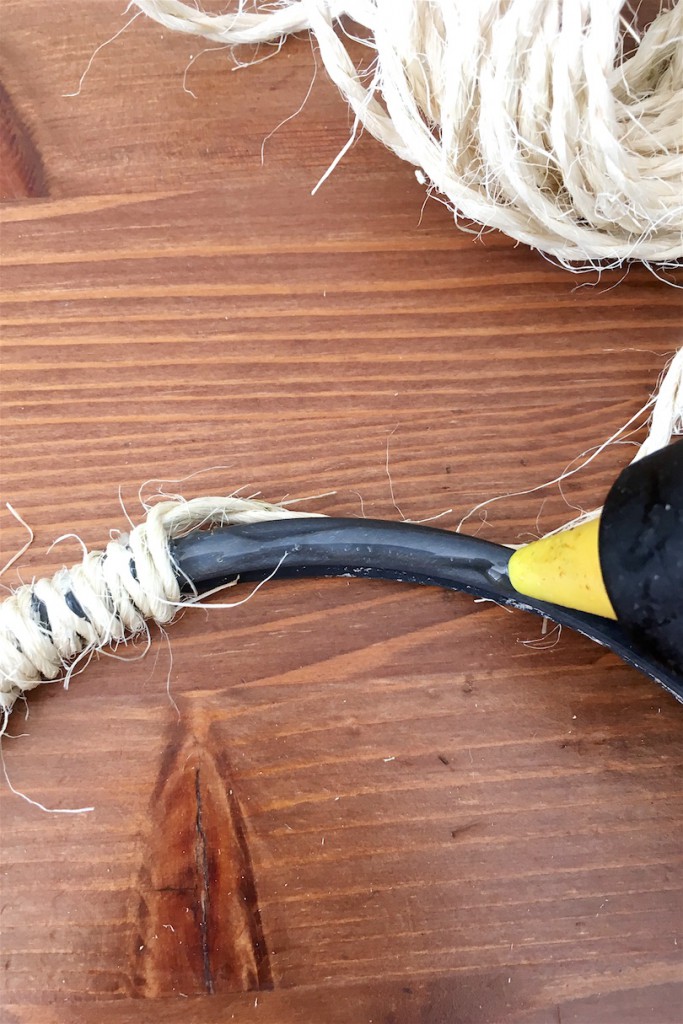
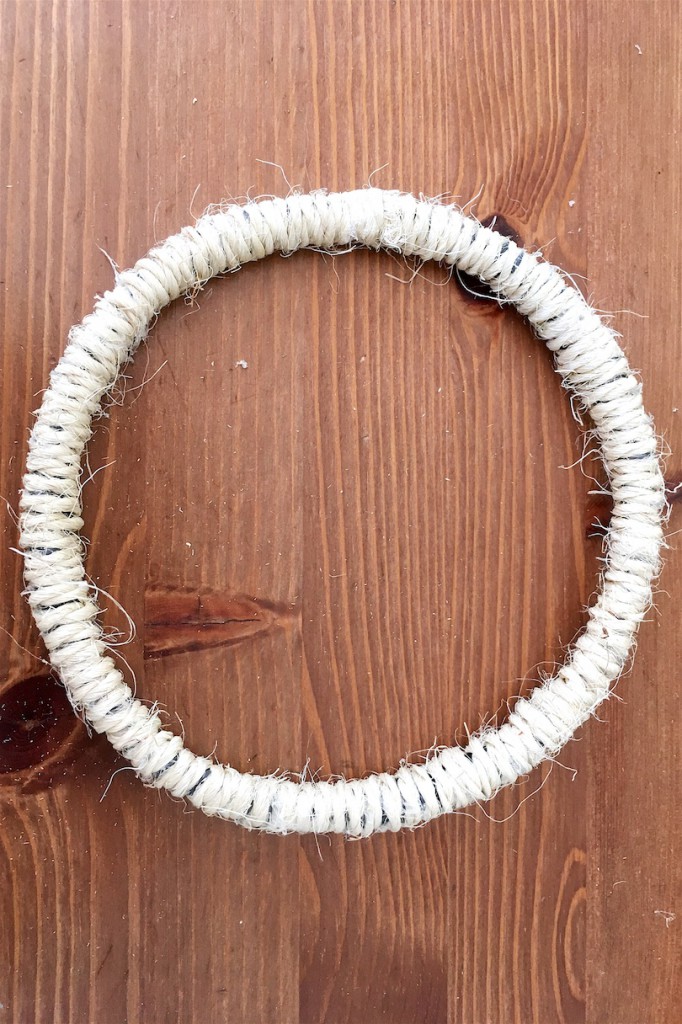
Then you start with the ring. If you have a nice ring – perfect! If not, you have to get a little creative – I cut the top of a plastic pot and wrapped around a rope, which i fixated with hot glue. You will see some parts of the ring, if you’re not working super accurate, that’s why it was important to me, to make the ring look a little nicer.

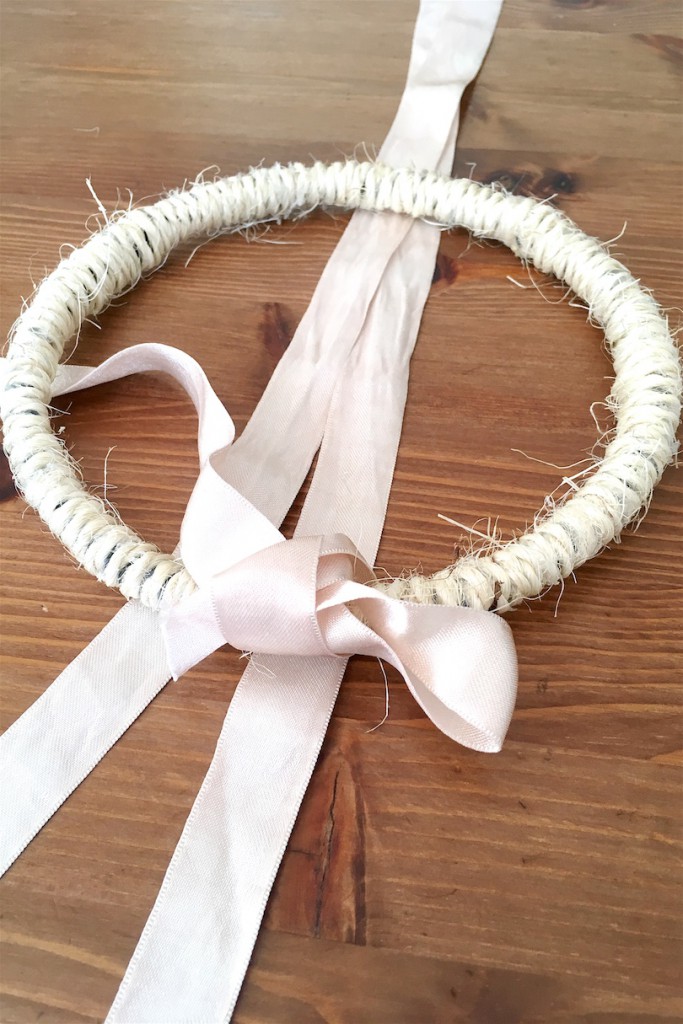
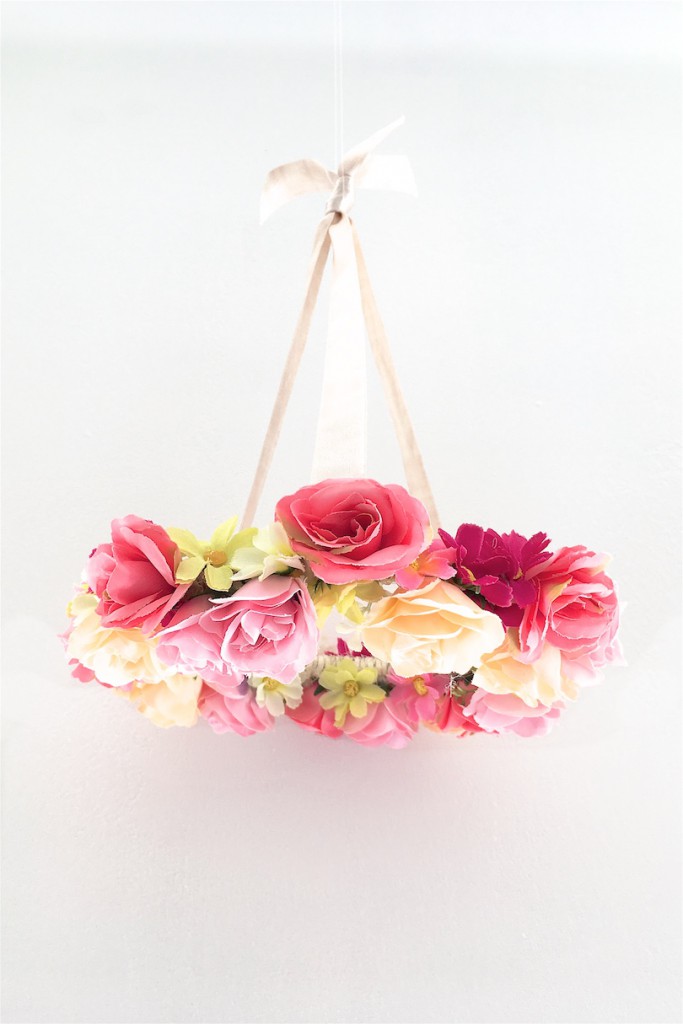
The next step is to cut the ribbon in three parts and knot it onto your ring. I also fixated these knots with hot glue, since they will carry the weight of the mobile.

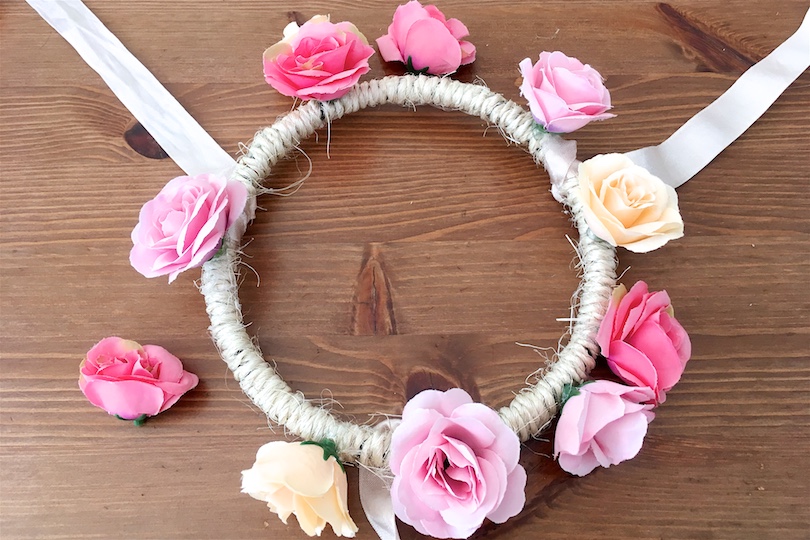
Now you can arrange the flowers the way you want to glue them onto the ring. I started with the biggest flowers. Keep in mind how high you will hang the flower chandelier and which parts will be visible the most. At the end I put greeneries in between, this way it looks a little bit more natural.
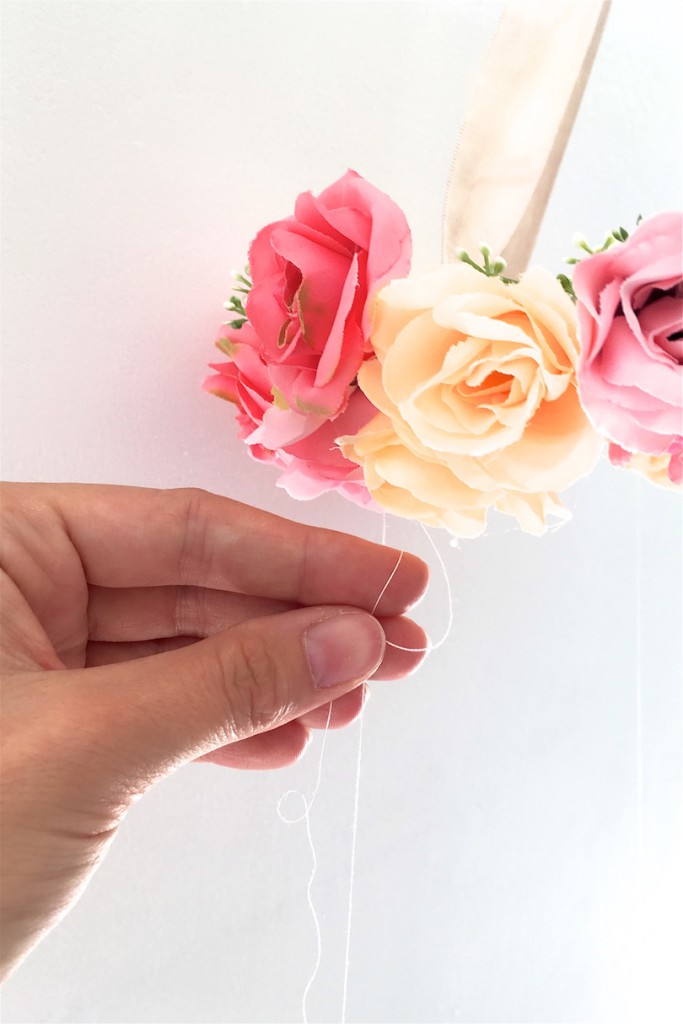
You’re almost done. Pick out the flowers you want to hang down from the wreath. Thread a needle (obviously attached to a string) through the picked flowers, so you can hang them onto the wreath later.


Last but not least knot the hanging flowers onto the wreath. I therefore first hung up the flower wreath – this way you can check out the height of each hanging flower more easy.
I really hope you like this flower chandelier diy and I wish you a wonderful start into the new week!


No Comments